Welcome to The Dutch Oven Thread, a few of us TB2K members thought it was a good idea to start a dedicated thread on this old rustic style of cooking.
Here we will be discussing equipment, cast Iron cookware in general and recipes and try to offer help and try to answer any questions about it.
Why Dutch Ovens? Good question, we all have to eat and for many its a hobby much like BBQ is and it's fun. For some it's a prep item and their wanting to learn more and practice using it for when the time comes. For camping it becomes gourmet cooking in the woods that hits it out of the park.
Dutch Oven cooking is not limited to outdoor use and has been done in a fireplace for centuries and even used in modern day ovens, they even make dutch ovens with flat bottoms with a domed lid that us dutcher's call bean pots and ideal for use in a modern day kitchen oven or stove top.
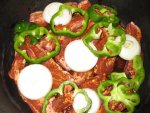
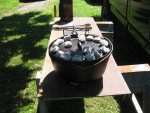
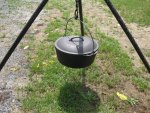
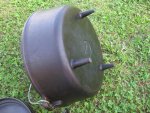
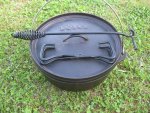
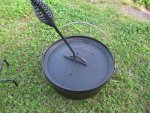
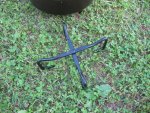
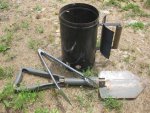
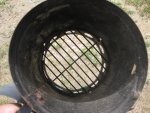
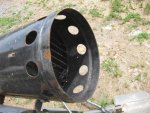
I will post a few photos to this thread to show some of the equipment used for this kind of cooking. Keep in mind I do not own everything thats out there, but over time some members may have it or acquire it and show some of it to us here.
Just about everything cooked in these rustic looking ovens can be and has been done in a modern day kitchen. So if your looking for something new to try and not wanting to go out and buy a Dutch Oven, come on in and have a look around and you may find some thing that looks good and want to give it a try using your pots, pans and other cooking equipment you already have.
EDIT ADD A Few Hot Links To Past Forum Threads On The Subject.
http://www.timebomb2000.com/vb/showthread.php?293690-Must-have-prep-Dutch-oven-and-accessories
http://www.timebomb2000.com/vb/showthread.php?518140-Any-Dutch-Oven-Masters-out-there
Here we will be discussing equipment, cast Iron cookware in general and recipes and try to offer help and try to answer any questions about it.
Why Dutch Ovens? Good question, we all have to eat and for many its a hobby much like BBQ is and it's fun. For some it's a prep item and their wanting to learn more and practice using it for when the time comes. For camping it becomes gourmet cooking in the woods that hits it out of the park.
Dutch Oven cooking is not limited to outdoor use and has been done in a fireplace for centuries and even used in modern day ovens, they even make dutch ovens with flat bottoms with a domed lid that us dutcher's call bean pots and ideal for use in a modern day kitchen oven or stove top.
I will post a few photos to this thread to show some of the equipment used for this kind of cooking. Keep in mind I do not own everything thats out there, but over time some members may have it or acquire it and show some of it to us here.
Just about everything cooked in these rustic looking ovens can be and has been done in a modern day kitchen. So if your looking for something new to try and not wanting to go out and buy a Dutch Oven, come on in and have a look around and you may find some thing that looks good and want to give it a try using your pots, pans and other cooking equipment you already have.
EDIT ADD A Few Hot Links To Past Forum Threads On The Subject.
http://www.timebomb2000.com/vb/showthread.php?293690-Must-have-prep-Dutch-oven-and-accessories
http://www.timebomb2000.com/vb/showthread.php?518140-Any-Dutch-Oven-Masters-out-there
Last edited:


") and I won't go there and just leave it alone at that. I have never eatten Possum but from what I have been told and read that its pretty darn good, my self never cared much for sweet poatoe.
and I won't go there and just leave it alone at that. I have never eatten Possum but from what I have been told and read that its pretty darn good, my self never cared much for sweet poatoe.